How to Vinyl Wrap a Car
Vehicle Wraps
Introduction
Fructify Marketing warmly welcomes you to our comprehensive guide on how to vinyl wrap a car! Vinyl wrapping is a popular method to give your vehicle a fresh look, protect its original paint, or promote your business with eye-catching designs. In this detailed guide, we will walk you through the entire process, from preparation to finishing touches. Follow our expert tips and techniques to achieve professional-quality results.
Benefits of Vinyl Wrapping
Vinyl wrapping offers numerous advantages over traditional paint jobs. Here are some key benefits:
- Enhanced Aesthetics: Vinyl wraps come in a wide range of colors, finishes, and textures, allowing you to customize the look of your car to your liking.
- Paint Protection: Vinyl wraps act as a protective layer, shielding your vehicle's original paint from minor scratches, UV rays, and other environmental damage.
- Cost-Effective: Vinyl wrapping is often more affordable than repainting your entire vehicle, making it an excellent option for budget-conscious individuals.
- Advertising Opportunity: Business owners can utilize vinyl wraps as a mobile advertising medium, effectively promoting their brand wherever the vehicle goes.
- Temporary or Permanent: Vinyl wraps can be easily removed without damaging the underlying paint, allowing for changes in design or reverting to the original appearance if desired.
Step-by-Step Guide to Vinyl Wrapping
Step 1: Vehicle Preparation
Properly preparing your vehicle is crucial for a successful vinyl wrap. Follow these steps:
- Clean the Surface: Thoroughly wash your car with a mild detergent, ensuring all dirt, grime, and wax residue are removed. Allow it to dry completely.
- Prep the Workspace: Choose a well-ventilated area, preferably indoors, to minimize dust and wind interference during the installation process.
- Remove Hardware: If feasible, remove any emblems, badges, or accessories that may hinder the vinyl application. This step ensures a smoother and more seamless result.
- Sand and Smooth: Lightly sand the surface of the vehicle with fine-grit sandpaper to create a better bonding surface. Follow up with a primer if necessary.
- Inspect for Imperfections: Address any dents, dings, or rust issues before beginning the vinyl wrapping process. A flat and well-prepared surface is essential for optimal results.
Step 2: Measure and Cut
Accurate measurements and precise cutting are vital for a seamless vinyl wrap:
- Measure the Vehicle: Use a measuring tape to determine the dimensions of different parts of your car, including the hood, doors, fenders, and bumpers.
- Create Templates: Transfer the measurements onto a vinyl sheet, creating templates for each section. Ensure adequate overlap for better maneuverability during installation.
- Cut the Vinyl: Using a sharp utility knife, carefully cut along the templates you created, ensuring clean edges and accurate shapes.
Step 3: Application Process
Follow these steps to apply the vinyl wrap to your vehicle:
- Prepare the Vinyl: Warm the vinyl sheets using a heat gun or hairdryer to improve flexibility and adhesion.
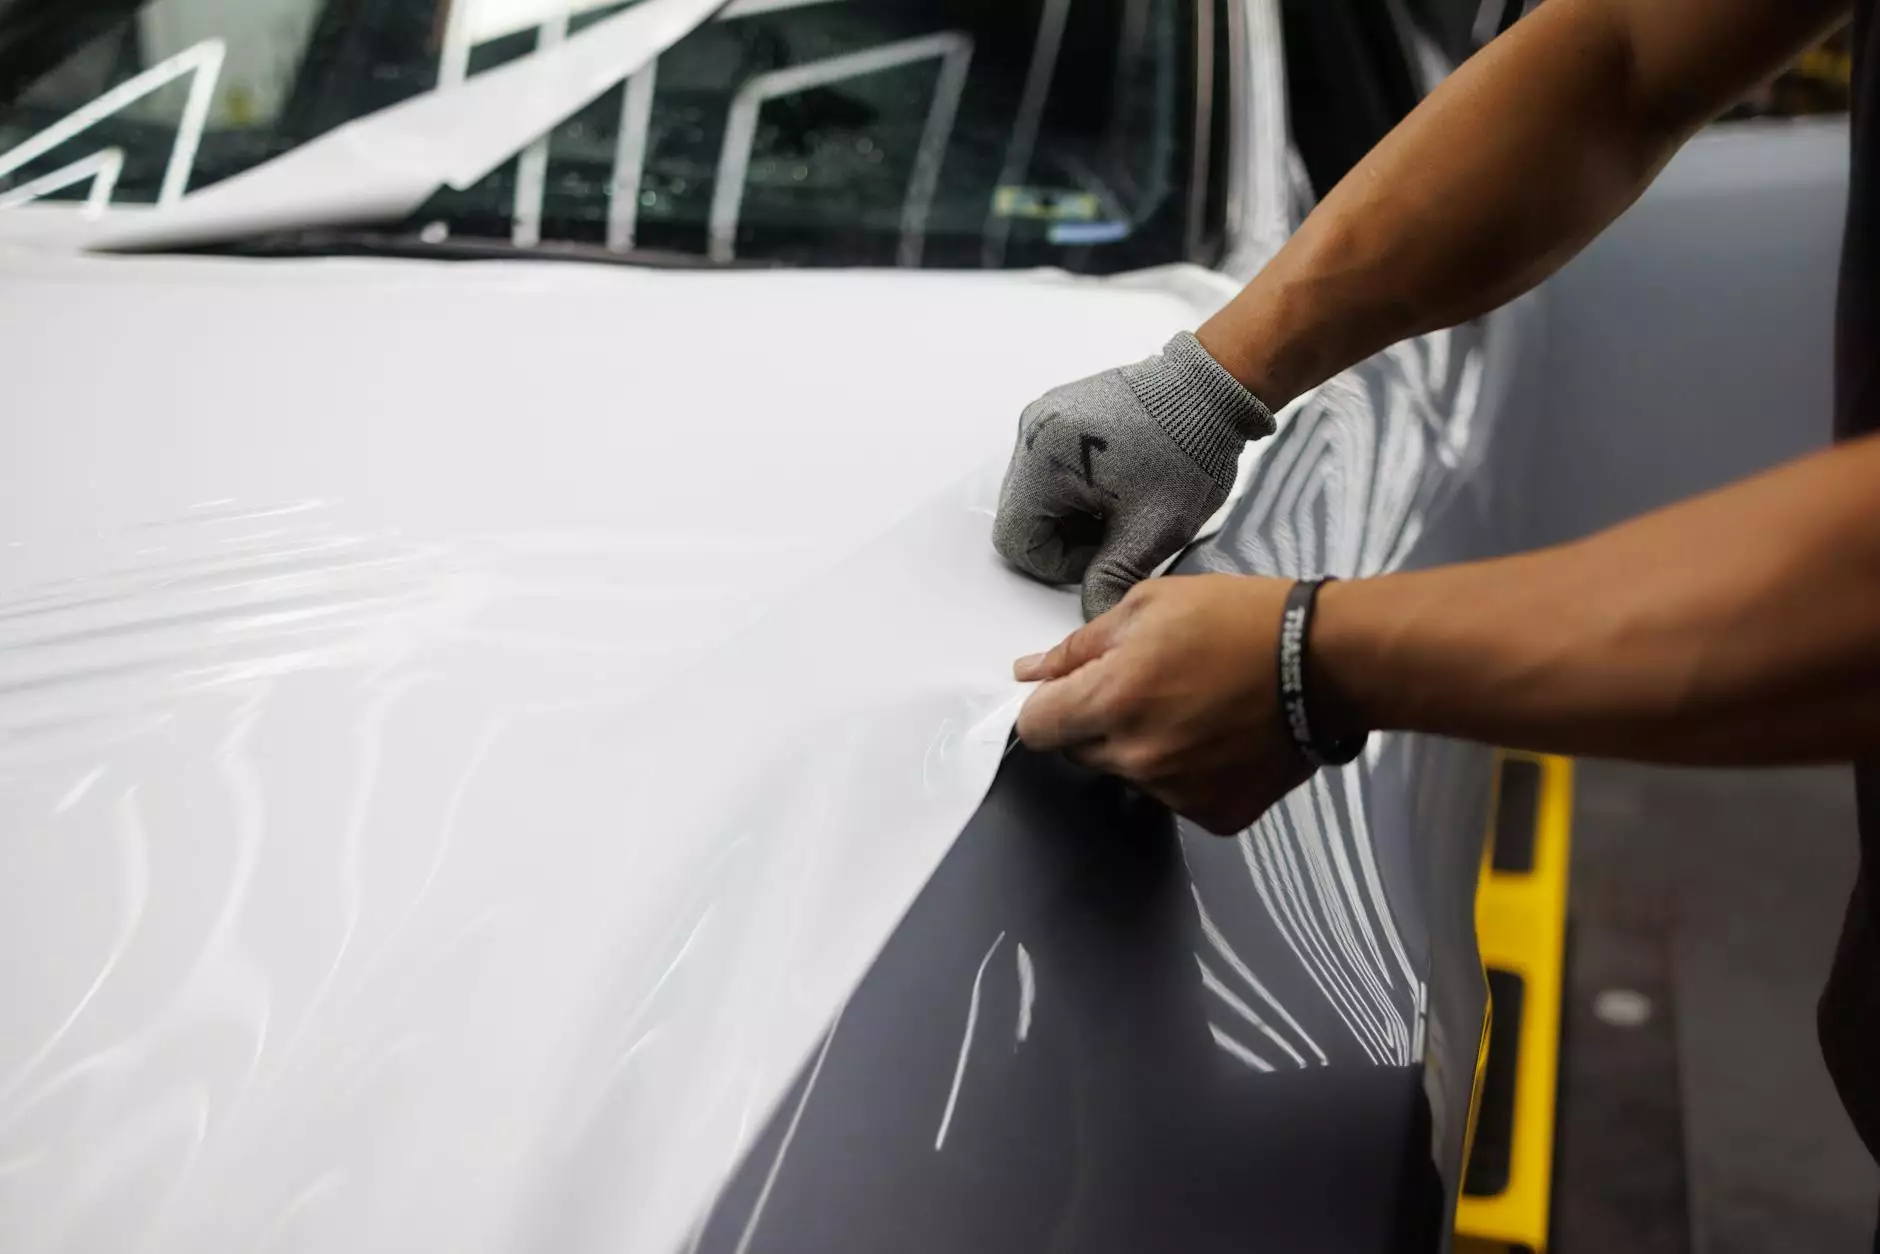
- Position the Vinyl: Starting with the largest sections, position the vinyl over the designated area, ensuring a slight overlap for a seamless finish.
- Smooth Out Air Bubbles: Use a squeegee or rubber roller to carefully push out any trapped air bubbles. Work from the center towards the edges.
- Trim Excess Vinyl: Once the vinyl is securely in place, trim any excess material using a sharp blade, following the contours of the car.
- Heat and Stretch: For curved surfaces or intricate areas, use a heat gun to gently warm the vinyl, allowing it to stretch and conform smoothly.
- Repeat the Process: Continue applying the vinyl to other sections of the vehicle, making necessary adjustments to ensure a tight and uniform fit.
Step 4: Finishing Touches
Complete the vinyl wrap installation with these final touches:
- Inspect for Imperfections: Thoroughly examine the wrapped surface for any bubbles, creases, or imperfections. Smooth them out with heat and a squeegee if necessary.
- Trimming and Tucking: Carefully trim excess vinyl around edges and tight corners. Use a heat gun to aid in tucking the vinyl securely for a clean, professional look.
- Apply Heat: Go over the entire wrapped surface with a heat gun to activate the adhesive and ensure proper bonding.
- Allow for Curing Time: Let the vinyl wrap cure for the recommended duration before exposing the vehicle to water, harsh weather, or challenging conditions.
Conclusion
Congratulations! You have now completed the whole process of vinyl wrapping your car like a pro. By following our detailed guide and incorporating expert tips from Fructify Marketing, you can achieve outstanding results that will make your vehicle stand out from the crowd. Whether you are looking to update your car's appearance, protect its original paint, or promote your business, vinyl wrapping is an excellent solution. Enjoy the benefits of enhanced aesthetics, cost-effectiveness, and paint protection with your newly vinyl-wrapped car!


